Introduction
The FileUpload control displays a text box control and a browse button that enable users to browse a file from the local or remote machine to upload it on the Web server. You can upload a file on the Web Server by specifying the full path of the file to be uploaded (for example D:\Myfiles\Test.txt) in the textbox of this control . Alternatively , you can select the file by clicking the browse button , and then locating it in the Choose File dialog box.
Public Properties of the FileUpload Class
FileBytes : Obtains an array of the bytes in a file that is specified by using a FileUpload control
FileContent : Obtains a Stream object that points to a file to upload using the FileUpload control.
FileName : Obtains the name of a file on a client to upload using the FileUpload control.
HasFile : Obtains a value indicating whether the FileUpload control contains a file.
PostedFile : Obtains the underlying HttpPostedFile object for a file that is uploaded by using the FileUpload control.
Public Method of the FileUpload Class
SaveAs : Saves the data of an uploaded file to a specified path on the web server.
Example of FileUpload control in ASP.NET
<%@ Page Language="C#" %>
<!DOCTYPE html>
<script runat="server">
protected void Button1_Click(object sender, EventArgs e)
{
if (FileUpload1.HasFile)
{
FileUpload1.SaveAs(Server.MapPath("~/images/" + FileUpload1.FileName));
}
else
{
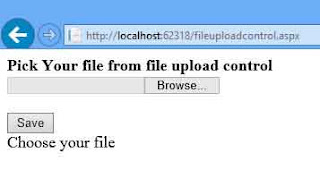
emptyupload.Text = "Choose your file";
}
}
</script>
<html xmlns="http://www.w3.org/1999/xhtml">
<head runat="server">
<title></title>
<style type="text/css">
.auto-style1 {
font-size: larger;
}
</style>
</head>
<body>
<form id="form1" runat="server">
<div class="auto-style1">
<strong>Pick Your file from file upload control<br />
</strong>
<asp:FileUpload ID="FileUpload1" runat="server" />
<br />
<br />
<asp:Button ID="Button1" runat="server" OnClick="Button1_Click" Text="Save" />
<br />
<asp:Label ID="emptyupload" runat="server"></asp:Label>
</div>
</form>
</body>
</html>
Output<!DOCTYPE html>
<script runat="server">
protected void Button1_Click(object sender, EventArgs e)
{
if (FileUpload1.HasFile)
{
FileUpload1.SaveAs(Server.MapPath("~/images/" + FileUpload1.FileName));
}
else
{
emptyupload.Text = "Choose your file";
}
}
</script>
<html xmlns="http://www.w3.org/1999/xhtml">
<head runat="server">
<title></title>
<style type="text/css">
.auto-style1 {
font-size: larger;
}
</style>
</head>
<body>
<form id="form1" runat="server">
<div class="auto-style1">
<strong>Pick Your file from file upload control<br />
</strong>
<asp:FileUpload ID="FileUpload1" runat="server" />
<br />
<br />
<asp:Button ID="Button1" runat="server" OnClick="Button1_Click" Text="Save" />
<br />
<asp:Label ID="emptyupload" runat="server"></asp:Label>
</div>
</form>
</body>
</html>


Only GIF image support by FileUpload control
<script runat="server">
protected void Button1_Click(object sender, EventArgs e)
{ string extn=string.Empty ;
if (FileUpload1.HasFile)
{
extn = System.IO.Path.GetExtension(FileUpload1.FileName);
if ("gif" == extn)
{
FileUpload1.SaveAs(Server.MapPath("~/images/" + FileUpload1.FileName));
emptyupload.Text = "Save sucessfully";
}
else
{
emptyupload.Text = "only gif support";
}
}
else
{
emptyupload.Text = "Choose your file";
}
}
</script>
Note : GetExtension is the method of the path class which is detect extension of the filename. protected void Button1_Click(object sender, EventArgs e)
{ string extn=string.Empty ;
if (FileUpload1.HasFile)
{
extn = System.IO.Path.GetExtension(FileUpload1.FileName);
if ("gif" == extn)
{
FileUpload1.SaveAs(Server.MapPath("~/images/" + FileUpload1.FileName));
emptyupload.Text = "Save sucessfully";
}
else
{
emptyupload.Text = "only gif support";
}
}
else
{
emptyupload.Text = "Choose your file";
}
}
</script>
Tidak ada komentar:
Posting Komentar