Treeview control is used to display our data in hierarchical form, where some of the nodes are parent and some of them are children of their parents. In the left side of windows explorer there is a treeview containing some libraries, or our computer shortcuts and some favourites.
The parent node can be expanded or collapsed by the user. A simple treeview containing some nodes can be designed by the following XAML code:
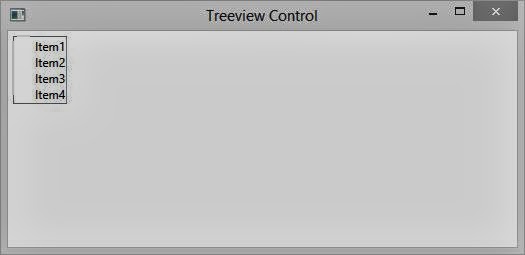
The code will place a treeview contains four items as described in above code. The code specifies that the treeview will placed in the left and top of the window having margin of 5 points as shown in the following image:
Now we have to add some children for the treeview item added above. Write the following XAML code:
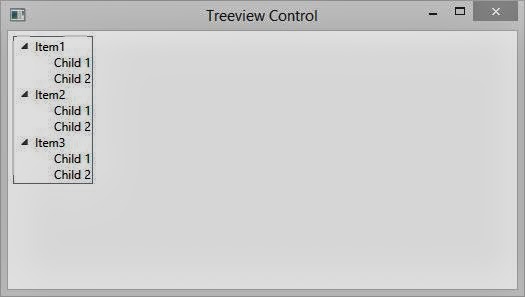
Run the project and it will show three parent nodes, each contains two children, as shown in the following image:
Like above children we can add more children to the parent node and a children can also have its children. The same process will follow up to add nested nodes.
See Also: How to use Treeview in Windows Forms
The parent node can be expanded or collapsed by the user. A simple treeview containing some nodes can be designed by the following XAML code:
<TreeView HorizontalAlignment="Left" VerticalAlignment="Top">
<TreeViewItem Header="Item1"/>
<TreeViewItem Header="Item2"/>
<TreeViewItem Header="Item3"/>
<TreeViewItem Header="Item4"/>
</TreeView>
<TreeViewItem Header="Item1"/>
<TreeViewItem Header="Item2"/>
<TreeViewItem Header="Item3"/>
<TreeViewItem Header="Item4"/>
</TreeView>
The code will place a treeview contains four items as described in above code. The code specifies that the treeview will placed in the left and top of the window having margin of 5 points as shown in the following image:
Now we have to add some children for the treeview item added above. Write the following XAML code:
<TreeView HorizontalAlignment="Left" VerticalAlignment="Top" Margin="5">
<TreeViewItem Header="Item1">
<TreeViewItem Header="Child 1"></TreeViewItem>
<TreeViewItem Header="Child 2"></TreeViewItem>
</TreeViewItem>
<TreeViewItem Header="Item2">
<TreeViewItem Header="Child 1"></TreeViewItem>
<TreeViewItem Header="Child 2"></TreeViewItem>
</TreeViewItem>
<TreeViewItem Header="Item3">
<TreeViewItem Header="Child 1"></TreeViewItem>
<TreeViewItem Header="Child 2"></TreeViewItem>
</TreeViewItem>
</TreeView>
Run the project and it will show three parent nodes, each contains two children, as shown in the following image:
Like above children we can add more children to the parent node and a children can also have its children. The same process will follow up to add nested nodes.
See Also: How to use Treeview in Windows Forms
Tidak ada komentar:
Posting Komentar